Django Datta Able PRO
Premium Django Starter coded on top of Datta Able design (Premium Version).
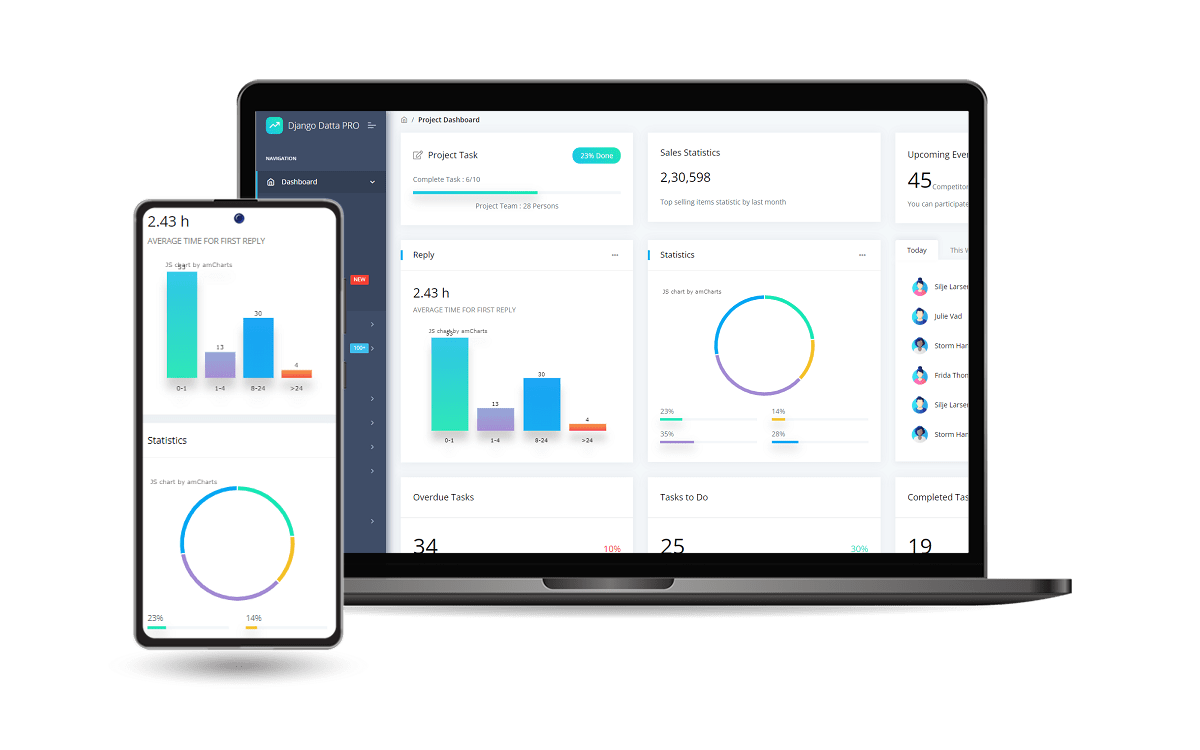
Django Dashboard crafted by AppSeed on top of a modern design. Datta Able is a premium Bootstrap 5
Dashboard that comes with feature-rich pages and developer-centric code components.
This design provides many prebuilt admin layouts which give you the best selection choice for a modern dashboard.
- 👉 Django Datta Able PRO -
Product page - 👉 Django Datta Able PRO -
LIVE Demo
Features
Up-to-date dependencies- Database:
SQLite(default), PgSQL, MySql - Authentication
Session-Based authenticationSocial Login: Github
- User Extended profile
- API via DRF
- DataTables
- Charts
- Celery (Async Tasks)
- File Manager
Docker- Automated e2e Tests - reports generated in
HTML and Videoformat
Environment
To use the starter, Python3 should be installed properly in the workstation.
If you are not sure if Python is installed, please open a terminal and type python --version. Here is the full list with dependencies and tools required to build the app:
- Python3 - the programming language used to code the app
- GIT - used to clone the source code from the Github repository
- Basic development tools (g++ compiler, python development libraries ..etc) used by Python to compile the app dependencies in your environment.
- (Optional)
Docker- a popular virtualization software
Start in Docker
Step 1 - Download the code and unzip the sources (requires a
purchase).
$ unzip django-datta-able-pro.zip
$ cd django-datta-able-pro
Step 2 - Start the APP in
Docker
# Optional (kill all existing containers)
$ docker container kill $(docker ps -q) ; docker container rm $(docker ps -a -q) ; docker network prune -f
# Start the APP
$ docker-compose up --build
Visit http://localhost:5085 in your browser. The app should be up & running.
Manual Build
Step 1 - Download the code and unzip the sources (requires a
purchase).
$ unzip django-datta-able-pro.zip
$ cd django-datta-able-pro
Step 2 - Create new
.envfromenv.sample
The meaning of each variable can be found below:
DEBUG: ifTruethe app runs in develoment mode- For production value
Falseshould be used
- For production value
- Edit
SECRET_KEY: add strong secret key
Step 3 - Activate the Virtual Environment and Install Modules
$ virtualenv env
$ source env/bin/activate
$ pip install -r requirements.txt
Step 4 - Migrate Database (by Default SQLite is used)
$ python manage.py makemigrations
$ python manage.py migrate
Step 5 - Create Superuser
$ python manage.py createsuperuser
Step 6 - Start the App
$ python manage.py runserver
At this point, the app runs at http://127.0.0.1:8000/.
Start Celery
- Make sure you have a Redis Server running:
redis://localhost:6379$ redis-cliand typeping
- In the base directory inside
tasks_scriptsfolder you need to write your scripts file. - Run the celery command from the CLI.
$ export DJANGO_SETTINGS_MODULE="core.settings"
$ celery -A apps.tasks worker -l info -B
- You will see a new route
Apps -> Tasksin the sidebar. - You can start and cancel any task from the UI.
Tests
Software Prerequisites (Docker & NodeJS)
- Check Docker installation by typing
docker infoon a terminal screen. - Install NodeJS
v20.5.0or above.- check the installation via
node --version
- check the installation via
Running
testson Linux/macOS
$ test.sh
Running
testson Windows
$ test.bat
The testing report is saved in the test_reports directory in HTML and Video Format.
Django Datta PRO - Automatized End-To-End Tests
Deploy on Render
- Create a Blueprint instance
- Go to https://dashboard.render.com/blueprints this link.
- Click
New Blueprint Instancebutton. - Connect your
repowhich you want to deploy. - Fill the
Service Group Nameand click onUpdate Existing Resourcesbutton. - After that your deployment will start automatically.
At this point, the product should be LIVE.
Resources
- 👉 Access AppSeed for more starters and support
- 👉 Get in touch for Custom Development Services